Login or create new account.
By registering on joomprod.com, you will have immediate access to all our free products and to the public side of our support forum.
Enjoy our subscriptions.
Each of our subscriptions allow you to enjoy the private side of the support forum and all the update of our products for a period ranging from 3 months to 1 year.
Payment And immediate download.
After subscribing to one of our subscription, the products are immediately downloadable.
Login
AdsManager Create your classified website easily
The fastest way to grow your business with the leader in classified ads for Joomla.
AdsManager - End of life
It is with great regrets that we have chosen to end the developpement of Adsmanager and its other associated components.
AdsManager is born 10 years ago and, as of today, the number of new subscriptions and downloads have fallen and we cannot maintain the component anymore.
All active subscribers will be able to continue enjoying support until the end of their subscription.
The components will be free and no support will be provided anymore for the other users.
Check our portfolio on juloa.com
Looking for a Joomla Developer ?
Juloa is experienced in creating professional Joomla! websites and Mobile Applications.
Our team of graphic artists, web developers, will help you to bring your project to reality with respect of delay and price !
Don't hesitate to contact us to present your project in English or in French.

services
Full websites development
Joomla! and other CMS
With years of experience, we will help you to identify and build the best website from your project
Component adaptation
To fit your needs !
Juloa components but also other components (Hikashop,K2,Community Builder,...)
Joomla Developer
Need a expert ?
Your business requires a specific code for Joomla, we are here to help you !
Mobile Applications
Android / iOS
Connect your website with an application: Chat, Directory, Games, whatever is your project
Template Design
Because a good design makes the difference !
CSS customization for a template you purchased, or unique template design
PHP/ Javascript Developer
Because there is more than Joomla!
PHP Javascript developer for WordPress,Zend Framework, Node.js, Angular.js
-
Some projects :
- Custom Component to display weather data on a leaflet map
- City Portal Mobile Application: Events, Directory, Weather,...
- Holiday Vacation Rentals Website
- Weddings Directory Website and Mobile Application.
- Ticket Events Marketplace
- Classified PDF newspaper generator based on AdsManager Ads.


Requirement
Method
Settings Tab
How to get your app on the Google Play Store
- Getting Started
- Welcome
- Getting Started
- Set Environment Variables
- Signing your app
- Build your .apk
- Google PlayStore
- Create new app
Getting Started
Welcome
Here we are going to show you how to get your app available for download on the PlayStore.
What are you going to need ?
- Google Play Account - 25$
- PhoneGap Build Account - Free
- Authentication Tokens from PhoneGap
- Java
- Java JDK
Opineo allows you to do all of this and much more without signing up for an account or hire an expert. This DIY tool enables you to listen to your customers’ voice easily and instantly. All you have to do is go online, design your widget and place it on your website.
Getting Started
First we are going to create a Google Play Account. Follow the link to create your account. Create account.
Then, we need to create the PhoneGap Build account to automatically build your apps and test them on your device. Click here !
Now let's assign the Authentication Tokens from PhoneGap to your app (So PhoneGap knows wich app to build).
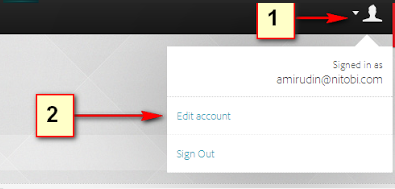
- First log into your PhoneGap account
- Then Edit your account
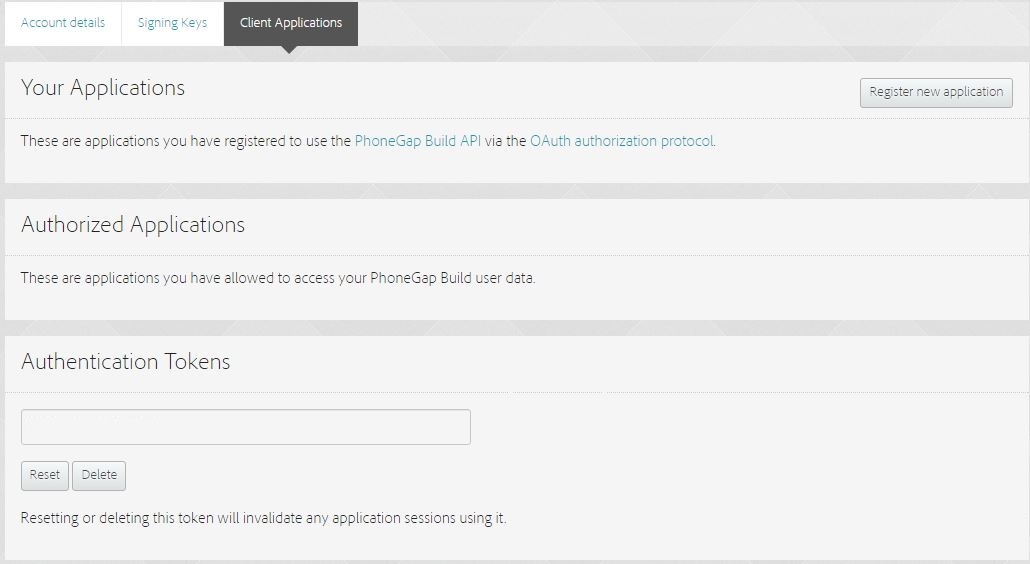
- Go to Client Application tab.
- And Reset your Token
- Go back to your App Settings on Joomprod and set your PhoneGap Token input with the token on PhoneGap.
Ok, now let's download JAVA on this website : Download JAVA.
Just one more download and it's over. Last thing we need is JAVA JDK, you can get it right there.
Set Environment Variables
Now you need to use JAVA and for that to work, you'll need to set an Environment Variables on your system. The JDK software is installed on your computer, for example, at C:\Program Files\Java\jdk1.6.0_02. You can move the JDK software to another location if desired.
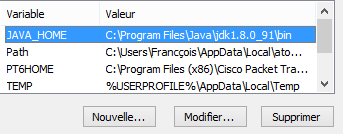
Set JAVA_HOME:
On Windows
- Right click My Computer and select Properties.
- On the Advanced tab, select Environment Variables, and then create JAVA_HOME to point to where the JDK software is located, for example, C:\Program Files\Java\jdk1.6.0_02.
On UNIX System
You can add it to the file .profile or .bashrc or your current shell profile file (located in your home directory). Then, each time you open your shell it will be loaded.
- export JAVA_HOME=jdk-install-dir
- export PATH=$JAVA_HOME/bin:$PATH
Signing your app
You do not need Android Studio to sign your app. You can sign your app from the command line using standard tools from the Android SDK and the JDK. To sign an app in release mode from the command line :
First you need to open the command line
- Hit Windows key + R
- Enter : cmd
You should have a black windows on your screen now.
Generate a private key using keytool. For example:
$ keytool -genkey -v -keystore my-release-key.keystore -alias alias_name -keyalg RSA -keysize 2048 -validity 10000The terms in red are the name you can change !
The terms in blue have to stay the same ! Don't change them.
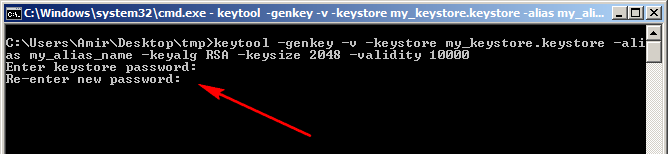
It creates a file so be careful where you are at in your command line. See the path at the begining of your command line your key will be created at the same location
This example prompts you for passwords for the keystore and key, and to provide the Distinguished Name fields for your key. It then generates the keystore as a file called my-release-key.keystore. The keystore contains a single key, valid for 10000 days. The alias is a name that you will use later when signing your app.
Submitting your key to Build
Go to your Account > Edit Setting > Signing Key's tab.
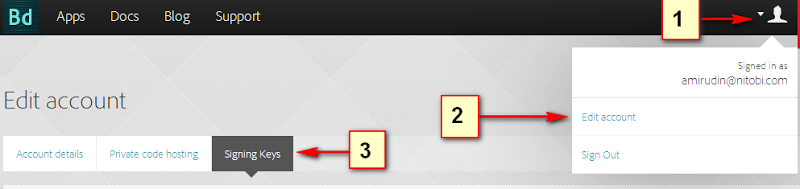
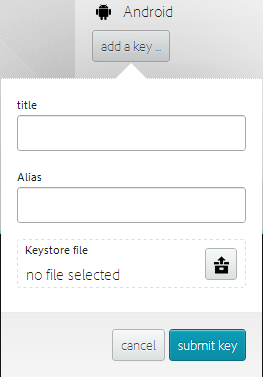
Click 'add a key...', ensuring you use the same alias used when you generated your key.
REMEMBER : The alias must be the same as the on you typed in the command line !
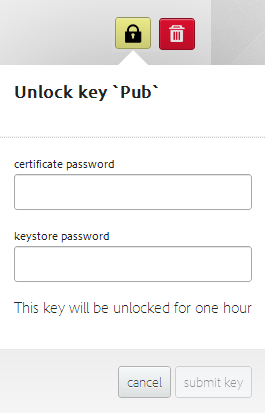
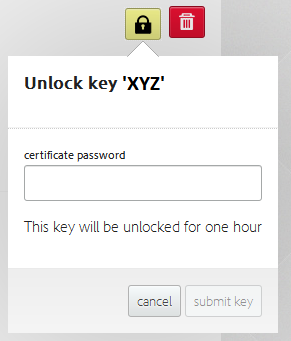
Unlocking your key
Go to your Account > Edit Setting > Signing Key's tab:
Click unlock button and supply the the certificate password and the keystore password
- Compile your app in release mode to obtain an unsigned APK. You can do that by clicking the green button : Compilation on the app page.
Build your .apk
Build your app on PhoneGap.
Enter your key infos if you havn't saved it yet, or select the key you saved from earlier.
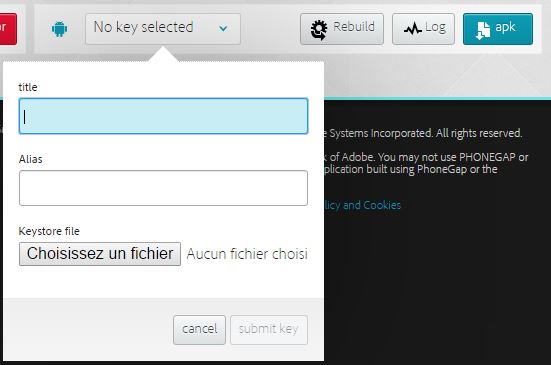
Last thing you want to do is download you apk by clicking the blue button !
Your .apk should have -release at the end of the file's name.
Google PlayStore
Log into your Google Developer Console.
Create new app
Fill out the information they ask you, such as :
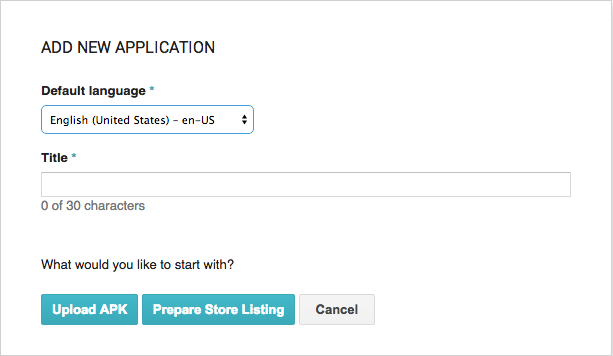
You can now give a title to your application and upload your apk you downloaded earlier from PhoneGap.
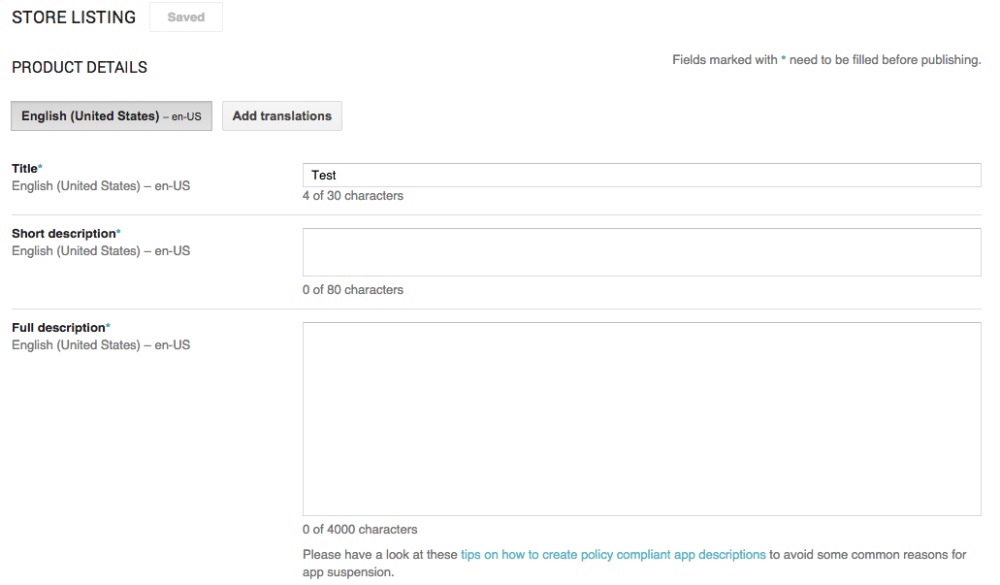
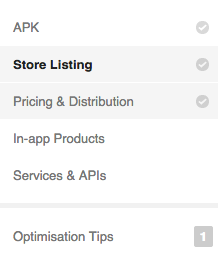
Follow all the steps and when it's done, you can publish your app this is found at the top right hand corner of the console. Once you have published, your app should be ready and live on the store in a matter of hours.
How to get your app on the AppStore
- Getting Started
- Welcome
- Getting Started
- Signing with Mac
- Certificate signing request
- Apple Developer Certificat
- Export to .p12
- Provisioning profil
- Signing with Windows
- OpenSSL
- AppStore
- Submit your build
- Unlock your key
- Create new app on the AppStore
Welcome
Here we are going to show you how to get your app available for download on the AppStore.
You are going to need a MAC for the Application Loader part. But you can create the .ipa file without a MAC.
If you don't have a Mac you can rent a virtual machine from MacInCloud for 1$/hour.
What are you going to need ?
- A ItunesConnect account - Create your acc
- A Mac (mandatory)
- Apple Developer account - 99$ per year
- PhoneGap Build Account - Free
- Authentication Tokens from PhoneGap
- Open SSL if you are on Windows
Getting Started
First we are going to create a MacInCloud Account. Follow the link to create your account. And get the Pay-As-You-Go Plan.
Then, we need to create the PhoneGap Build account to automatically build your apps and test them on your device. Click here !
Now let's assign the Authentication Tokens from PhoneGap to your app (So PhoneGap knows wich app to build).
- First log into your PhoneGap account
- Then Edit your account
- Go to Client Application tab.
- And Reset your Token
- Go back to your App Settings on Joomprod and set your PhoneGap Token input with the token on PhoneGap.
Signing your app with a MAC (From MacInCloud) :
First you need to generate a certificate signing request.
- First, go to the Keychain Access utility
- Go to Keychain Access -> Configuration Assistant -> Request a Certificate from a Certificate Authority

- Enter an email address and name for the Certificate and select "Saved to disk".

Note: CA Email address is not required since you selected the "Saved to disk" option.
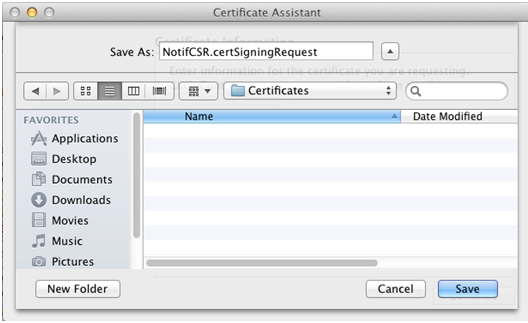
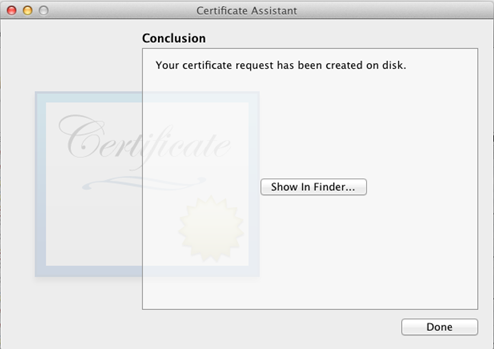
- Click "Continue" and select a location for the CSR file.
Your Certificate Signing Request has been created.
Apple Developer Certificat
After creating your .certSigningRequest you need to obtain an Apple Developer Certificat. You can get one from : Developer Apple
Follow the steps :
- Connect
- Click "+" to create a certification
- Select Production -> App Store
- Select your freshly created .certSigningRequest
- Download your certificate
Export to .p12
Next you'll export it to the P12 keystore format. To do this on Mac® OS:
- Open the Keychain Access application (in the Applications/Utilities folder).
- If you have not already added the certificate to Keychain, select File > Import. Then navigate to the certificate file (the .cer file) you obtained from Apple.
- Select the Keys category in Keychain Access.
- Select the private key associated with your iPhone Distribution Certificate. The private key is identified by the iPhone Developer: public certificate that is paired with it.
- Command-click the iPhone Developer certificate and select, Export "iPhone Developer: Name...".
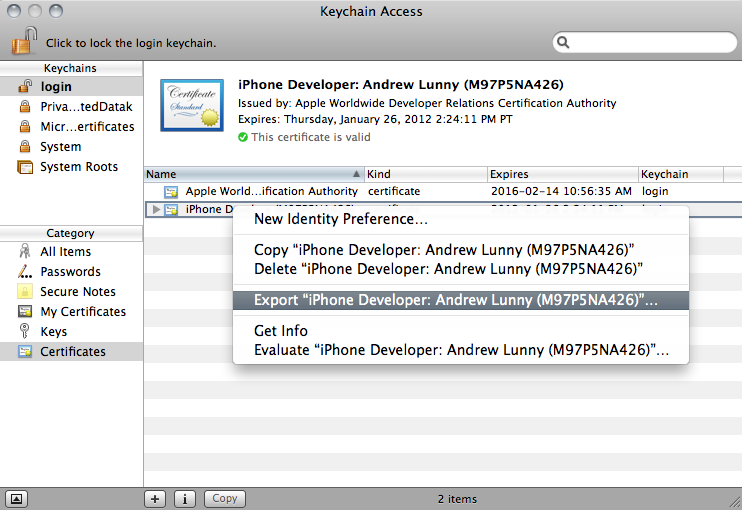
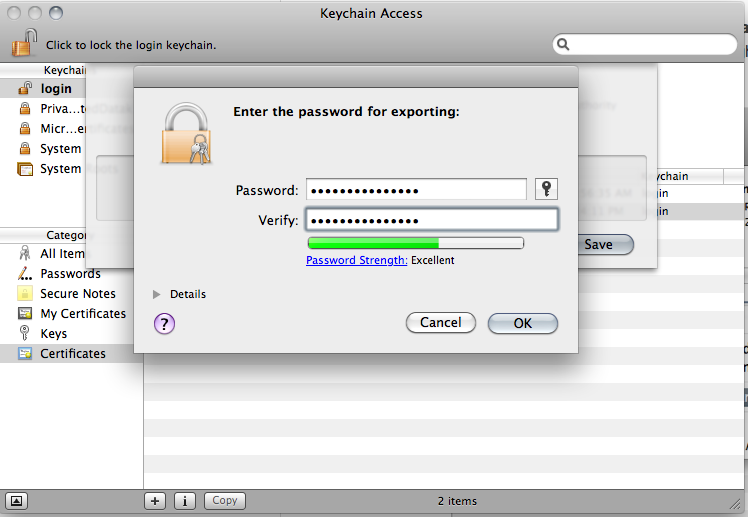
- Save your keystore in the Personal Information Exchange (.p12) file format.
- You will be prompted to create a password that is used when you use the keystore to sign applications or transfer the key and certificate in this keystore to another keystore.
Provisioning profil
Now you have to create a provisioning profil used to sign the app. It's quite easy don't panick !
- Visit Apple Developer Portal.
- Go to Provisioning section. Create new profile under Distribution tab.
- Fill the form with Profile Name, Certificates (as per .cer above), App ID and your Distribution device.
Signing your app with Windows
Signing your app with OpenSSL
You have to generate the same stuff as on a Mac but we will use Windows. In order to do this you got to download OpenSSL
Convert an Apple developer certificate to a P12 file on Windows
Generate a certificate signing request:
$ openssl req -nodes -newkey rsa:2048 -keyout private_key .key -out cer_sign_request .csrUpload that csr file to the Apple Developer Center and it will spit out a certificate (.cer).
When using OpenSSL be careful where you are in your directory. You have to be at first in C:\OpenSSL/bin and after where you put your key and certificat.
To develop apps via Build, you must use a P12 certificate file. You generate this certificate based on the Apple iPhone developer certificate file you receive from Apple.
Convert the developer certificate file you receive from Apple into a PEM certificate file. To do this, run the following command-line statement from the OpenSSL bin directory:
$ openssl x509 -in developer_identity .cer -inform DER -out developer_identity .pem -outform PEMYou can now generate a valid P12 file, based on the key and the PEM version of the iPhone developer certificate:
$ openssl pkcs12 -export -inkey mykey .key -in developer_identity .pem -out key_certificat .p12Submitting your key to Build
Go to your Account > Edit Setting > Signing Keys' tab:
Click 'add a key...' and supply your previously generated p12:
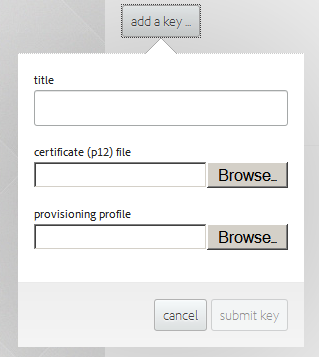
Unlocking the key.
Go to your Account > Edit Setting > Signing Keys' tab:
Click 'lock' button and supply the certificate password you used to export your cert.
Now you can dowload your .ipa
Create new app on Itunes Connect
Launch the Application Loader and choose Deliver Your App
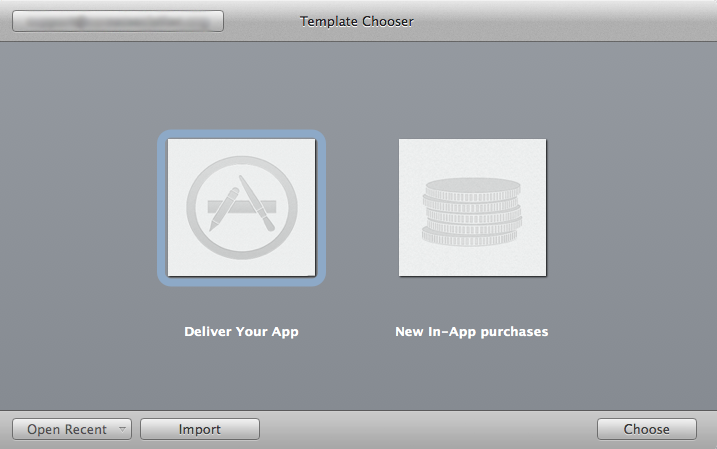
THIS IS THE PART YOU NEED TO DO WITH A MAC (MAYBE FROM MacInCloud).
Fill out the information they ask you, such as :
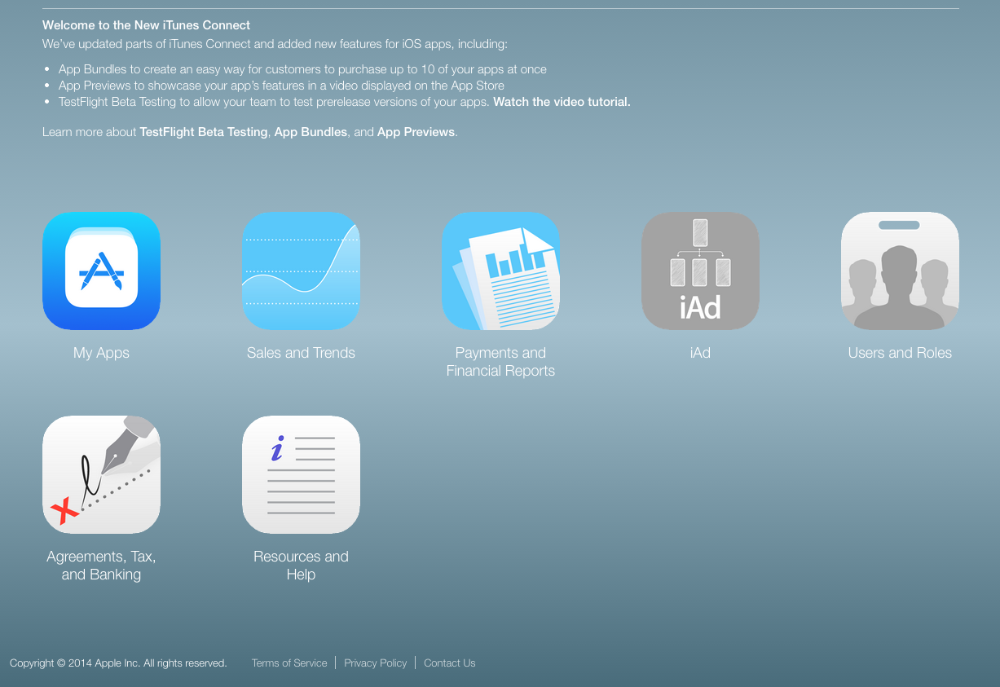
You can now give a title to your application .
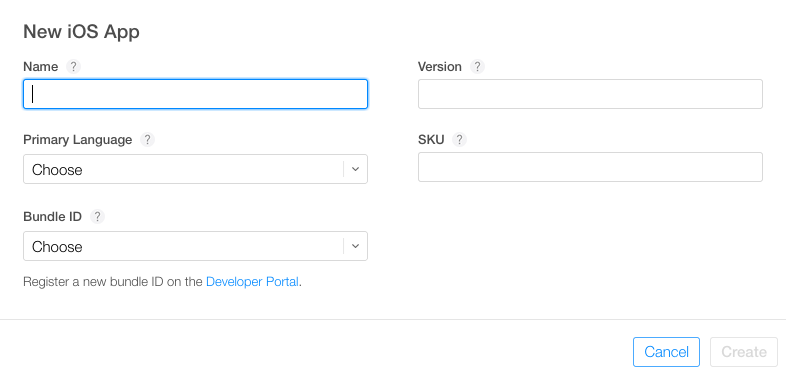
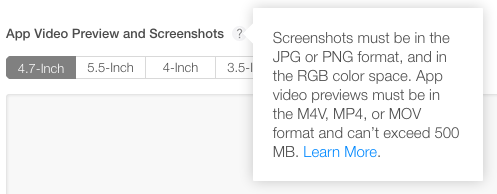
Now you have to give your app some screenshots on different resolution
Follow all the steps and when it's done, you can publish your app this is found at the top right hand corner of the console. Once you have published, your app should be ready and live on the store in a matter of hours.
Bring your Classified Website to the NEXT LEVEL !
Allow you user to use your classified ads website anywhere with the new mobile application of AdsManager.
Easy to set and easy to install, the mobile application for AdsManager is available for Android and iOs.


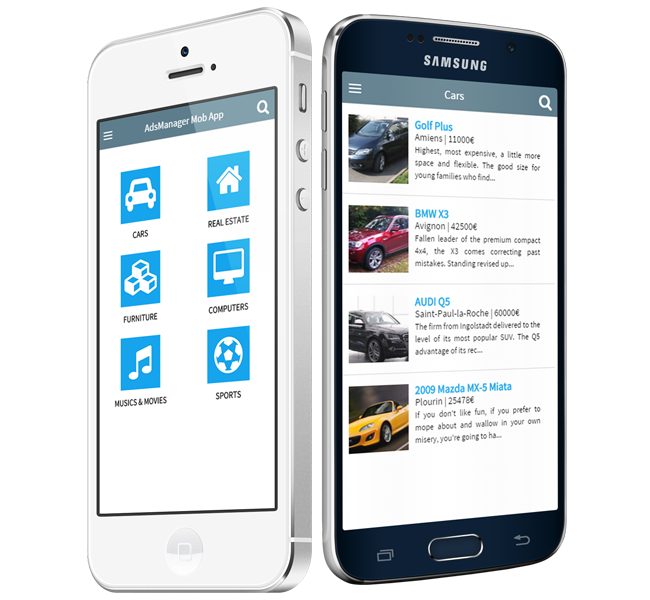
Get AdsManager Mobile App !
AdsManager Pro & MobApp
AdsManager latest version with pro features + Mobile Application
- All features of Adsmanager Pro
- Support: from configuration to submission on stores
- iOS + Android Builds
- LIFETIME license
- 12 months access to Support and upgrades
Best AdsManager Companion Ever
Cross-Platform
Android, iOS
We take care of compilation all you need is to provide platform certificate
Customisation
Background color, font color, font size
An interface is at your disposal to custom color and font size to make your application unique
Layout configuration
List, details, search, ...
You can assign your AdsManager Fields to different positions using Drag&Drop
Menu Editor
Make your own mobile menu, by creating item made of page reference, title and icon
Configuration
Fully Configurable : upload your splashcreen and icon, choose your starting page, decide which font you want
Real-time Preview
Watch your modification in live
-
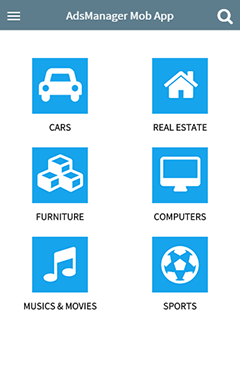
Categories View
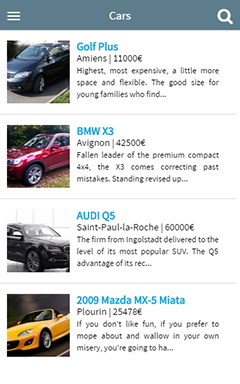
List View
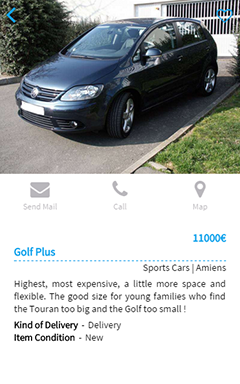
Details View
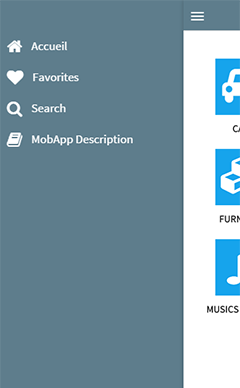
Slide Menu
With AdsManager Mobile Application:
- Easily customizable.
- Post ads, My invoices, My ads, My favorites,...
- Preview the result in real time.
- Add as many static pages as you want.
- Choose the links displayed in the side menu.
- Android and iOS support.
- Download your app with a scan of a QR code.
- Need more Features ? Contact us to get a quote for a Code Customization
Incoming :
- Push notifications