How to get your app on the AppStore
- Getting Started
- Welcome
- Getting Started
- Signing with Mac
- Certificate signing request
- Apple Developer Certificat
- Export to .p12
- Provisioning profil
- Signing with Windows
- OpenSSL
- AppStore
- Submit your build
- Unlock your key
- Create new app on the AppStore
Welcome
Here we are going to show you how to get your app available for download on the AppStore.
You are going to need a MAC for the Application Loader part. But you can create the .ipa file without a MAC.
If you don't have a Mac you can rent a virtual machine from MacInCloud for 1$/hour.
What are you going to need ?
- A ItunesConnect account - Create your acc
- A Mac (mandatory)
- Apple Developer account - 99$ per year
- PhoneGap Build Account - Free
- Authentication Tokens from PhoneGap
- Open SSL if you are on Windows
Getting Started
First we are going to create a MacInCloud Account. Follow the link to create your account. And get the Pay-As-You-Go Plan.
Then, we need to create the PhoneGap Build account to automatically build your apps and test them on your device. Click here !
Now let's assign the Authentication Tokens from PhoneGap to your app (So PhoneGap knows wich app to build).
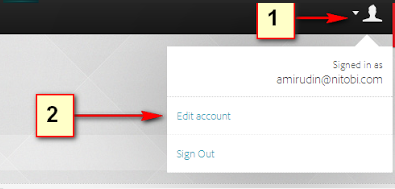
- First log into your PhoneGap account
- Then Edit your account
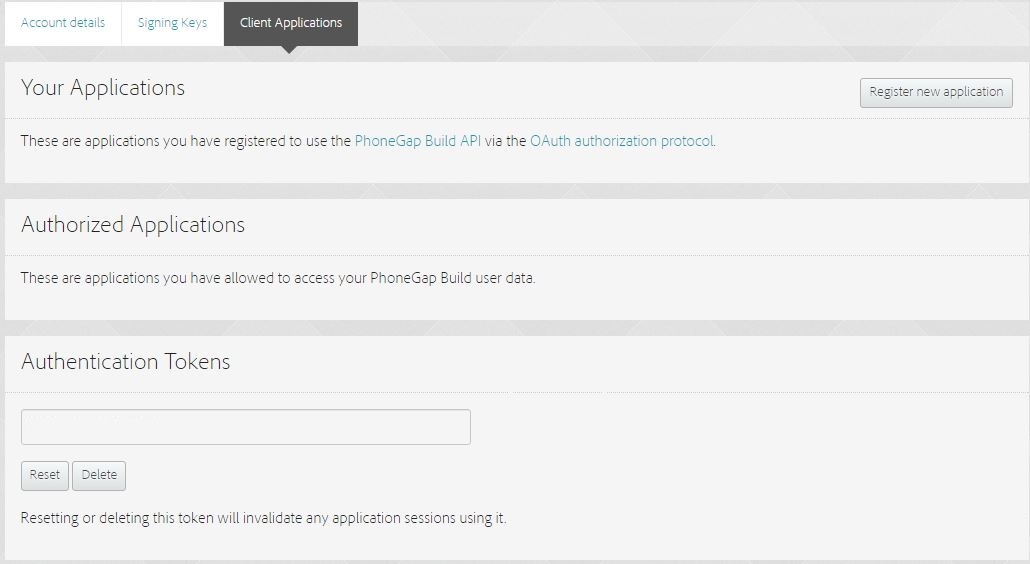
- Go to Client Application tab.
- And Reset your Token
- Go back to your App Settings on Joomprod and set your PhoneGap Token input with the token on PhoneGap.
Signing your app with a MAC (From MacInCloud) :
First you need to generate a certificate signing request.
- First, go to the Keychain Access utility
- Go to Keychain Access -> Configuration Assistant -> Request a Certificate from a Certificate Authority

- Enter an email address and name for the Certificate and select "Saved to disk".

Note: CA Email address is not required since you selected the "Saved to disk" option.
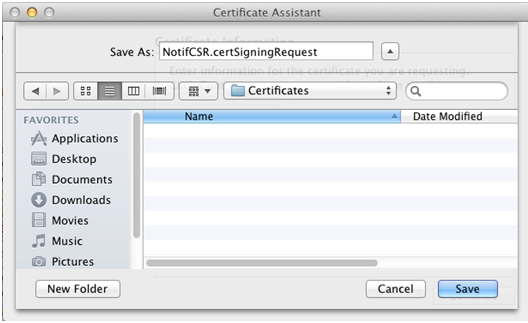
- Click "Continue" and select a location for the CSR file.
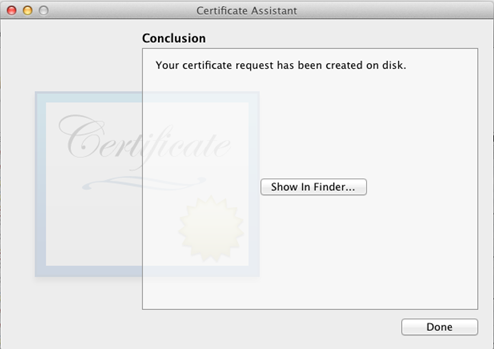
Your Certificate Signing Request has been created.
Apple Developer Certificat
After creating your .certSigningRequest you need to obtain an Apple Developer Certificat. You can get one from : Developer Apple
Follow the steps :
- Connect
- Click "+" to create a certification
- Select Production -> App Store
- Select your freshly created .certSigningRequest
- Download your certificate
Export to .p12
Next you'll export it to the P12 keystore format. To do this on Mac® OS:
- Open the Keychain Access application (in the Applications/Utilities folder).
- If you have not already added the certificate to Keychain, select File > Import. Then navigate to the certificate file (the .cer file) you obtained from Apple.
- Select the Keys category in Keychain Access.
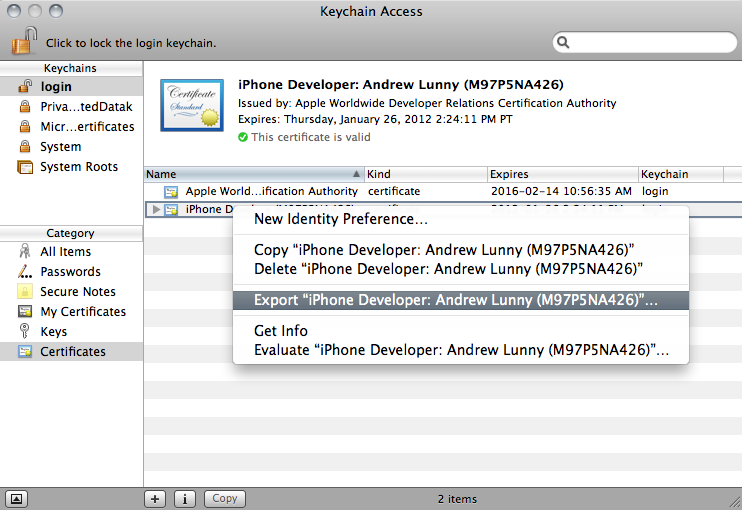
- Select the private key associated with your iPhone Distribution Certificate. The private key is identified by the iPhone Developer: public certificate that is paired with it.
- Command-click the iPhone Developer certificate and select, Export "iPhone Developer: Name...".
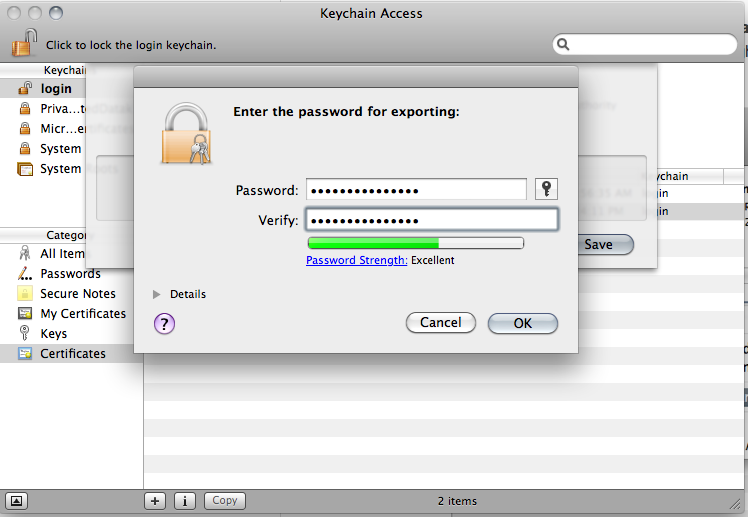
- Save your keystore in the Personal Information Exchange (.p12) file format.
- You will be prompted to create a password that is used when you use the keystore to sign applications or transfer the key and certificate in this keystore to another keystore.
Provisioning profil
Now you have to create a provisioning profil used to sign the app. It's quite easy don't panick !
- Visit Apple Developer Portal.
- Go to Provisioning section. Create new profile under Distribution tab.
- Fill the form with Profile Name, Certificates (as per .cer above), App ID and your Distribution device.
Signing your app with Windows
Signing your app with OpenSSL
You have to generate the same stuff as on a Mac but we will use Windows. In order to do this you got to download OpenSSL
Convert an Apple developer certificate to a P12 file on Windows
Generate a certificate signing request:
$ openssl req -nodes -newkey rsa:2048 -keyout private_key .key -out cer_sign_request .csrUpload that csr file to the Apple Developer Center and it will spit out a certificate (.cer).
When using OpenSSL be careful where you are in your directory. You have to be at first in C:\OpenSSL/bin and after where you put your key and certificat.
To develop apps via Build, you must use a P12 certificate file. You generate this certificate based on the Apple iPhone developer certificate file you receive from Apple.
Convert the developer certificate file you receive from Apple into a PEM certificate file. To do this, run the following command-line statement from the OpenSSL bin directory:
$ openssl x509 -in developer_identity .cer -inform DER -out developer_identity .pem -outform PEMYou can now generate a valid P12 file, based on the key and the PEM version of the iPhone developer certificate:
$ openssl pkcs12 -export -inkey mykey .key -in developer_identity .pem -out key_certificat .p12Submitting your key to Build
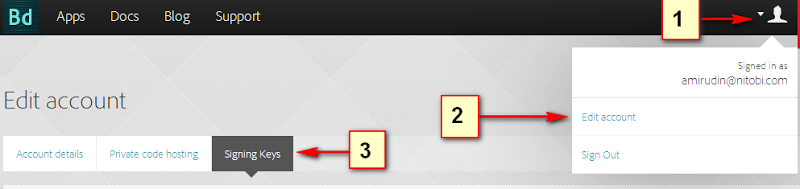
Go to your Account > Edit Setting > Signing Keys' tab:
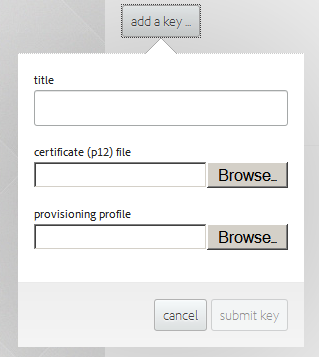
Click 'add a key...' and supply your previously generated p12:
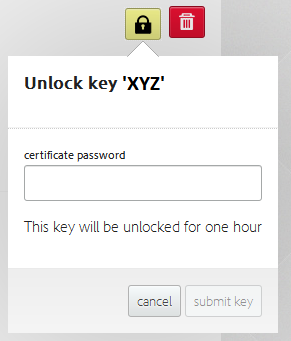
Unlocking the key.
Go to your Account > Edit Setting > Signing Keys' tab:
Click 'lock' button and supply the certificate password you used to export your cert.
Now you can dowload your .ipa
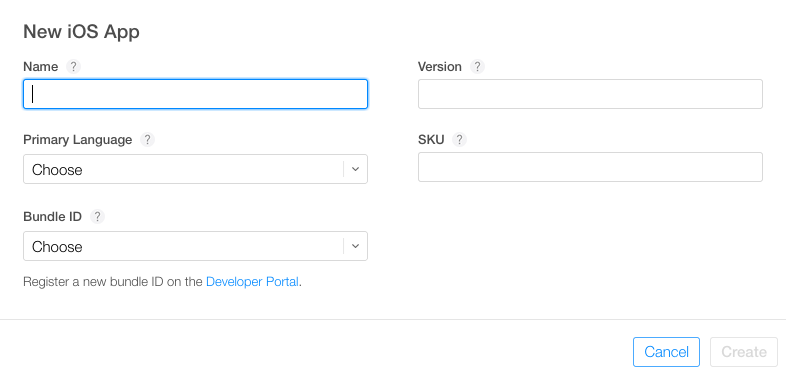
Create new app on Itunes Connect
Launch the Application Loader and choose Deliver Your App
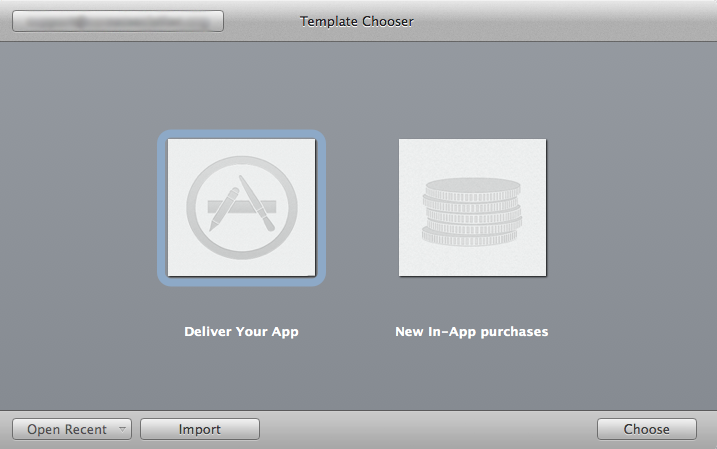
THIS IS THE PART YOU NEED TO DO WITH A MAC (MAYBE FROM MacInCloud).
Fill out the information they ask you, such as :
You can now give a title to your application .
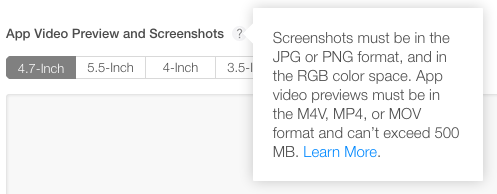
Now you have to give your app some screenshots on different resolution
Follow all the steps and when it's done, you can publish your app this is found at the top right hand corner of the console. Once you have published, your app should be ready and live on the store in a matter of hours.